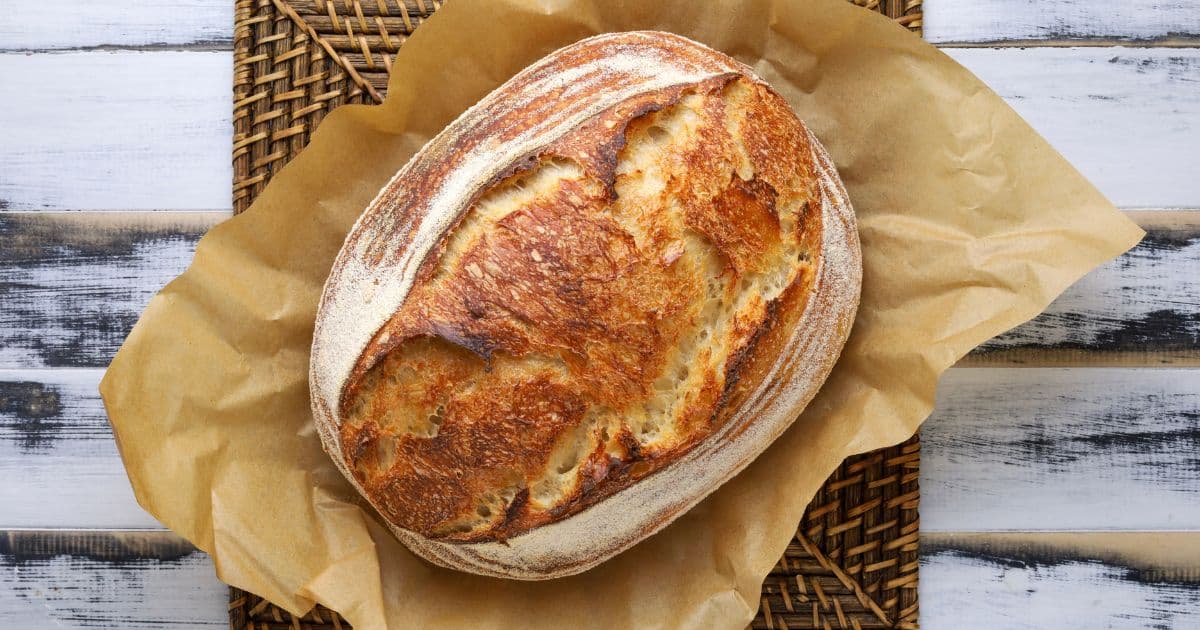
JAKARTA, blessedbeyondwords.com – Sourdough bread is more than just a loaf; it’s a testament to the art of fermentation and a celebration of flavors. With its tangy taste, chewy crust, and airy crumb, sourdough has captured the hearts (and stomachs) of bread enthusiasts around the world. Mastering the art of sourdough baking may seem daunting, but with a little patience and practice, you can create your own delicious loaves at home. In this article, we’ll explore the science behind sourdough, the fermentation process, and provide you with essential tips to bake your perfect loaf.
The Science of Sourdough
Sourdough bread relies on a natural fermentation process that uses wild yeast and lactic acid bacteria present in the environment. Unlike commercial yeast, which provides a quick rise, sourdough fermentation is slower and allows for the development of complex flavors. Here’s how it works:
1. Wild Yeast and Bacteria
Sourdough starters are a combination of flour and water that captures wild yeast and bacteria from the air and the flour itself. This culture ferments over time, creating a bubbly, tangy mixture that serves as the leavening agent for your bread.
2. Fermentation Process
During fermentation, wild yeast consumes the sugars in the flour, producing carbon dioxide and alcohol. The lactic acid bacteria contribute to the sour flavor by producing lactic acid. This process not only helps the dough rise but also enhances the bread’s flavor and texture.
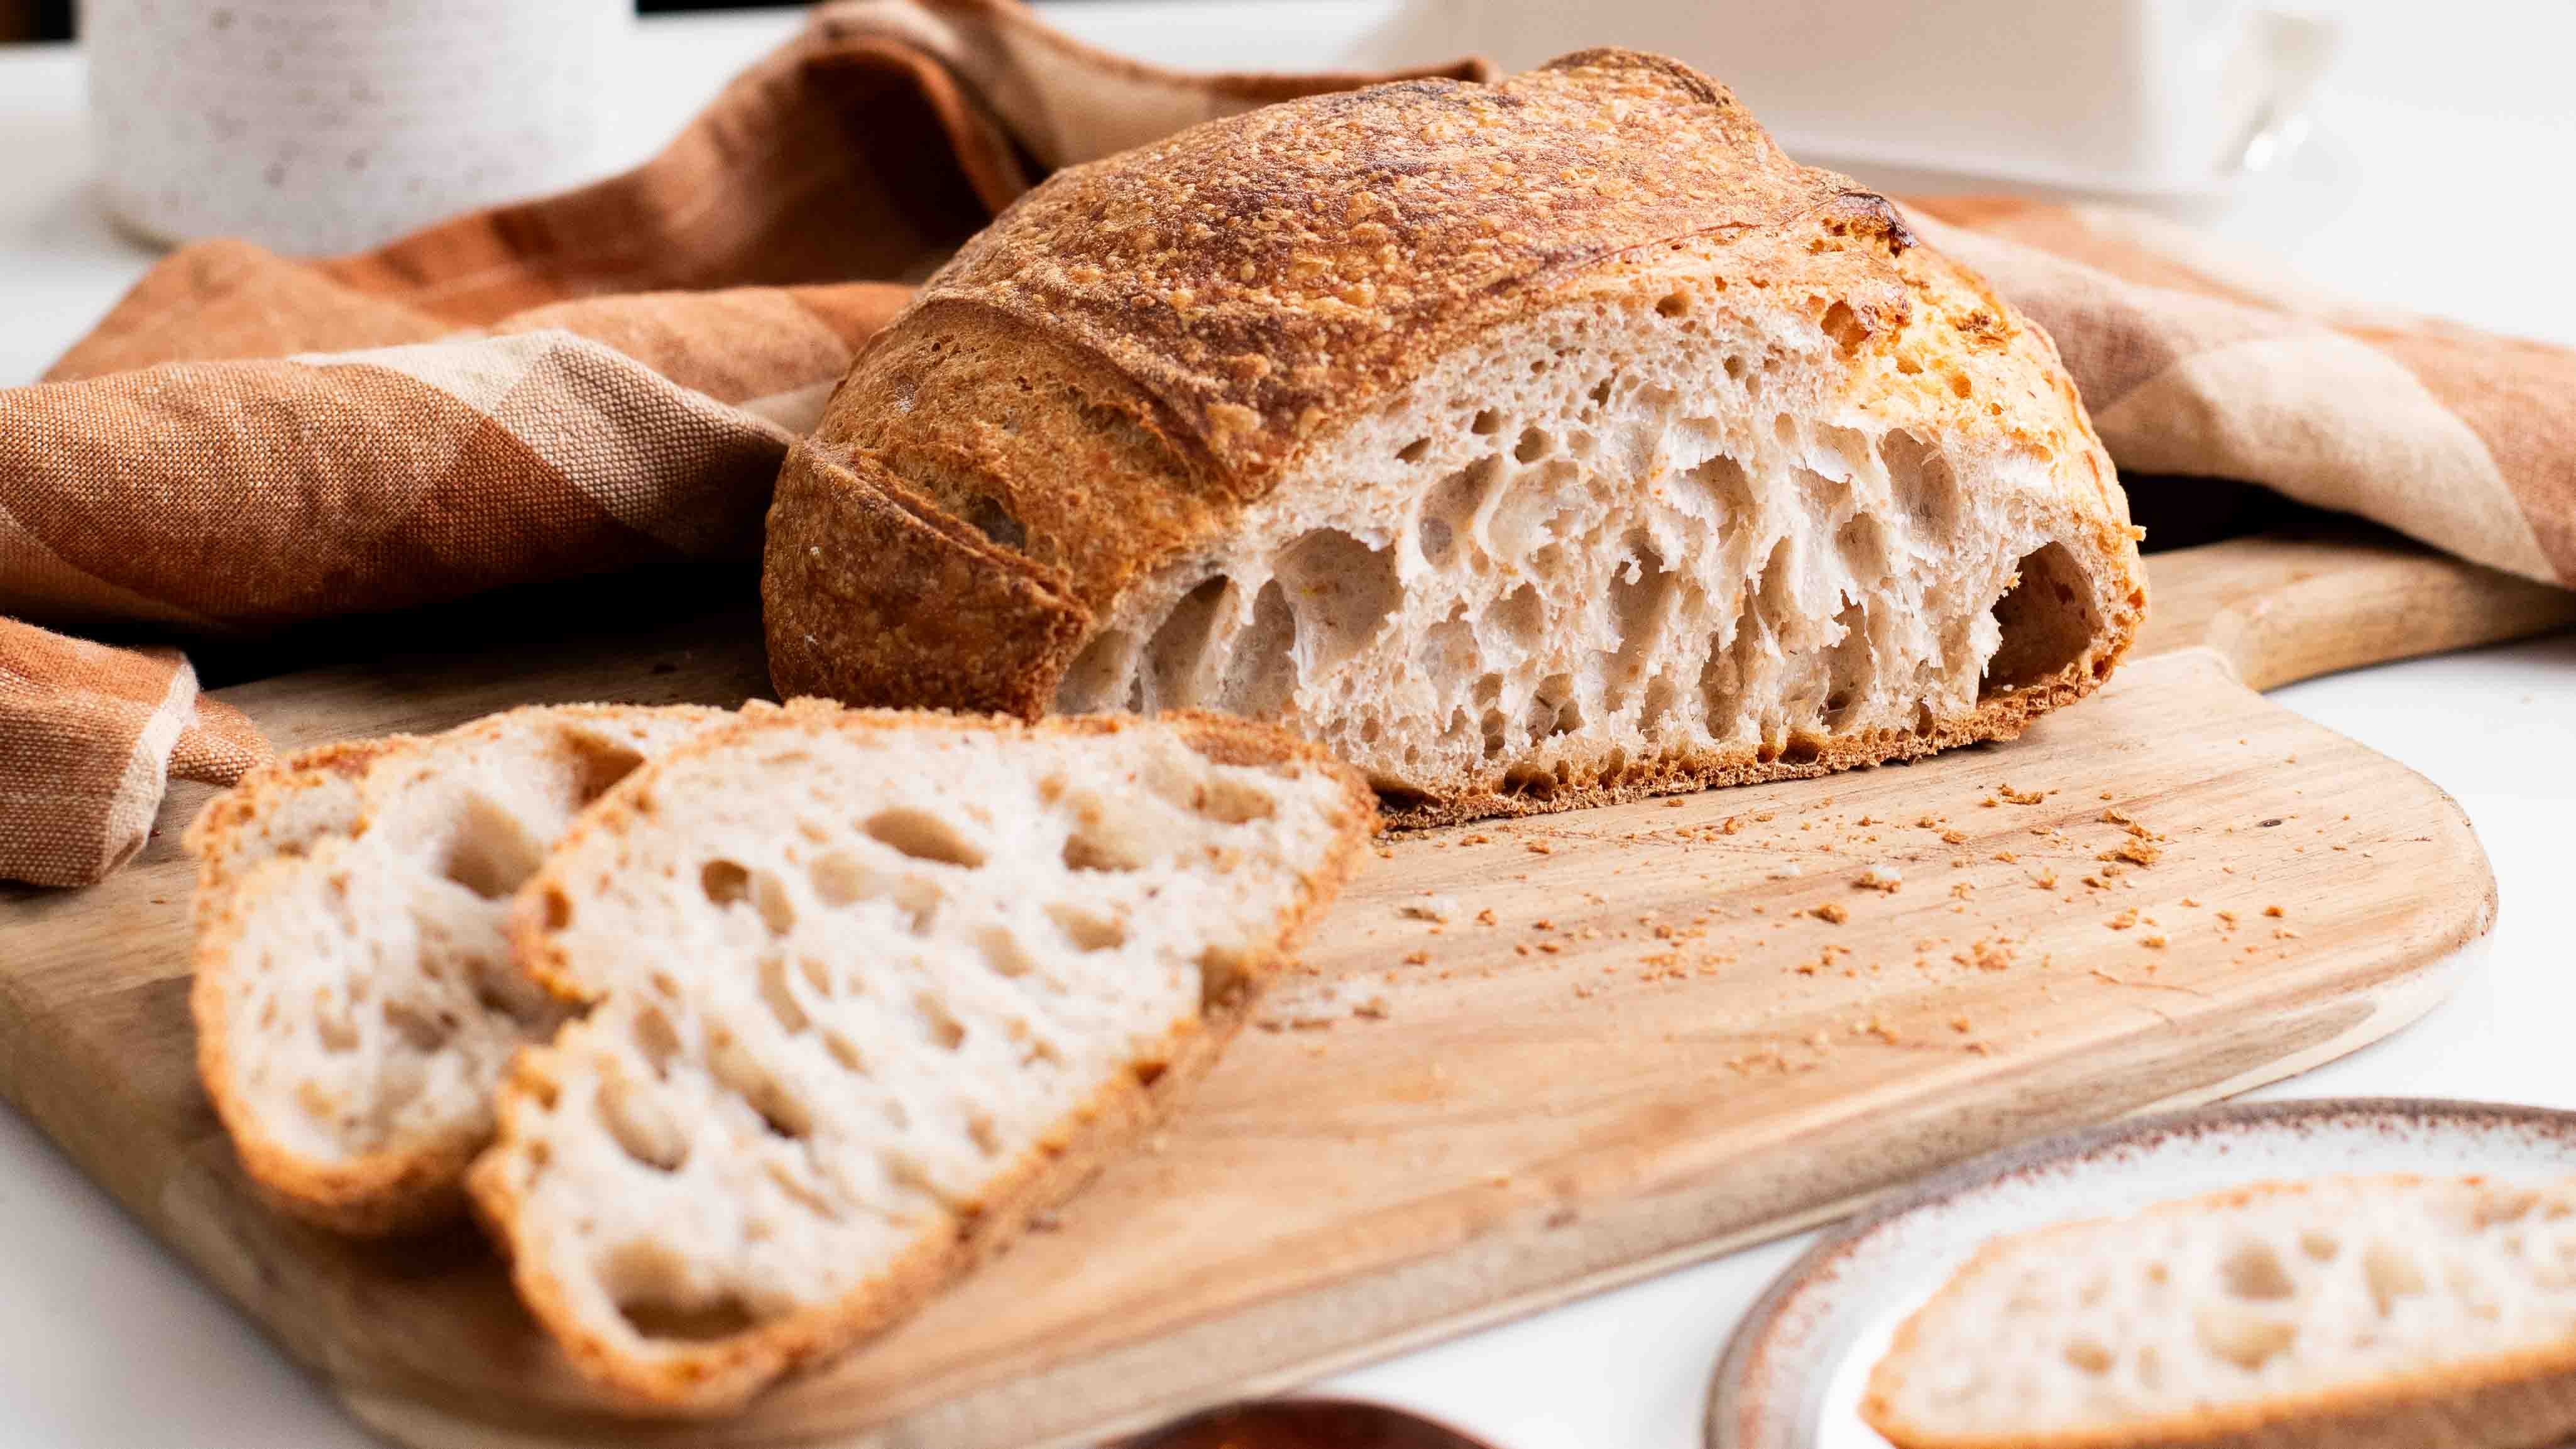
3. Gluten Development
The slow fermentation process allows for better gluten development, resulting in a bread that is both chewy and airy. The long fermentation also improves the digestibility of the bread, making it easier on the stomach.
Getting Started with Sourdough
1. Creating Your Sourdough Starter
To bake sourdough bread, you first need a healthy sourdough starter. Here’s a simple method to create one:
Ingredients:
- Whole wheat flour (or all-purpose flour)
- Water (filtered or dechlorinated)
Instructions:
- Day 1: In a clean glass jar, mix 100g of whole wheat flour with 100g of water. Mix until there are no dry pieces of flour remaining. Loosely cover the jar with a lid or cloth and allow it to rest at room temperature for 24 hours.
- Day 2-7: Each day, discard half of the starter and feed it with 100g of flour and 100g of water. In approximately 5-7 days, your starter should become bubbly, emit a pleasant sour aroma, and be ready for use.
2. Essential Tools for Baking
To successfully bake sourdough bread at home, consider having the following tools:
- Digital Scale: For accurate measurements.
- Mixing Bowls: For mixing and fermenting the dough.
- Bench Scraper: For shaping and handling the dough.
- Dutch Oven: For creating steam while baking, which helps develop a crispy crust.
- Sharp Knife: For scoring the dough before baking.
Baking Your First Sourdough Loaf
Ingredients
- 500g bread flour (or a mix of all-purpose and whole wheat)
- 350g water (room temperature)
- 100g a c t i v e sourdough starter
- 10g salt
Instructions
- Mix the Dough: In a big mixing bowl, combine the bread flour and water. Stir until there are no dry bits of flour. Allow it to rest for 30 minutes (this process is known as autolyse).
- Add Starter and Salt: After the autolyse, add the active starter and salt to the dough. Mix thoroughly until well incorporated.
- Bulk Fermentation: Cover the bowl with a damp cloth and let it sit at room temperature for 4-6 hours. During this time, perform stretch and folds every 30 minutes for the first 2 hours. This helps strengthen the dough.
- Shape the Dough: Once the dough has risen and is bubbly, turn it out onto a floured surface. Gently shape it into a round loaf, being careful not to deflate it too much.
- Second Rise: Place the shaped dough into a floured proofing basket (banneton) seam side up. Cover and let it rise for another 2-4 hours at room temperature, or overnight in the refrigerator for a cold proof.
- Preheat the Oven: About 30 minutes before baking, p r e h e a t the oven to 450°F (230°C) with a Dutch oven inside.
- Score and Bake: Gently take out the preheated Dutch oven and place the dough inside. Use a sharp knife to score the top of the loaf. Cover with the lid and bake for 30 minutes. Then, remove the lid and bake for an additional 15-20 minutes until golden brown.
- Cool and Enjoy: Once baked, transfer the bread to a wire rack to cool completely before slicing. Enjoy the fruits of your labor!
Tips for Successful Sourdough Baking
- Patience is Key: Sourdough baking takes time. Don’t rush the fermentation process; it’s essential for flavor development.
- Keep Your Starter Healthy: Regularly feed your sourdough starter and store it in the refrigerator if you’re not baking frequently.
- Experiment with Hydration: Adjusting the water content can change the texture of your bread. Higher hydration can lead to a more open crumb.
- Practice Makes Perfect: Don’t be discouraged by initial failures. Baking sourdough is a learning process, and each loaf teaches you something new.
Conclusion
Sourdough bread is a magical blend of art and science, allowing home bakers to create something truly special. By mastering the fermentation process and understanding the basics of sourdough baking, you can enjoy fresh, delicious loaves right from your kitchen. So grab your ingredients, nurture your starter, and embark on the rewarding journey of baking sourdough bread that will not only satisfy your taste buds but also impress your friends and family!
Sharpen Your Skills: Delve into Our Expertise on Food
Check Out Our Latest Piece on Food Presentation